Showing posts with label Gesso. Show all posts

Monday, January 16, 2017

This weeks Art Challenge

Hi all, I've managed a few Art projects this week, which makes me feel happy! I'm always up for a challenge, and the latest one I have discovered is with Marta Lapkowska, and her Creative Cafe, 52 cafe cards challenge!! So, you get yourself a deck of cards, I have a few spare packs from the kids showbags the last few years!!!


And then you just make ART on your card! One per week for 52 weeks!!!
I had fun with this, a great little mixed media canvas to work on. I Gessoed, and then started with paints, stamping, glued paper bits, texture paste...Then I found some of my bits and pieces in my Art Journal stash drawer and glued an old earring, some chipboard, a flower, and some gold twine. After a further layer of Gesso on the embellishments, I used some of the gorgeous, Lindy's, (Lindy's Stamp gang) Starburst Colour shots, which are powders and react with water. They are so shimmery and subtly gorgeous!!!
Here is the end result!!!! Week 1 done!


Thanks for looking,

Tuesday, November 15, 2016

My DT layout, inspired by the Scrappingclearly Moodboard

Hi all, hope you are having a great start to your week. The time is flying by and this is my last week, before we fly down South for 3 weeks. So, I have been very busy getting all my Design Team obligations sorted! Here's my layout for Scrappingclearly, based on the moodboard for this month!!! Firstly, Here is the moodboard:


Now for my layout:


If you want to read all about my process and the details regarding products, head to the Scrappingclearly blog here, to find our more! These are the products I have used:

CHICKANIDDY PAPERS
GESSO
COLOUR BLAST COLOUR PASTE
WE R MEMORY KEEPERS CLEARLY POSH ACETATE
HEIDI SWAPP GOLD ACETATE WORDS
MAGIE HOLMES CRATE PAPER BOWS
FLOWERS- PRIMA, KASZAZZ, MERCI & KAISERCRAFT
DUSTY ATTIC STENCIL
KAISER STAMP
HEIDI SWAPP MEMORY PLANNER TINY WOOD STAMP
DRINKING STRAW
KASZAZZ GOLD GLITTER TAPE & LEAVES
DISTRESS STAIN
D-LISH SCRAPS WASHI TAPE & FLAIR
MAGGIE HOLMES & CRATE PAPER, GOLD PRINTED VELLUM


Sunday, July 31, 2016

Kraft Plus July challenge

Hi all, I am scraping this one in again this month. I so like to do the Kraft Plus challenge each month, but I seem to be having less time. However, I still have quite a few hours left in the day and it's the last day of the challenge, and I made it!!! So this months inspiration & requirement, was the moodboard and Sheet music and of course on a Kraft background. Here's the sweet board:


I was inspired by the Script, and sheet music, and flowers, and the two pastel colours of mint green and pinky/peach.


I started with a collage background of some torn sheet music and an old book page, then gessoed over the top of them. I then sprayed two different colours of Heidi Swapp Colorshine over that and when dry, I stamped a Newsprint background and Music stamp, both from Kaszazz. I had only the one piece of old sheet music paper which was given to me by one of my Art Journal students. How cool! I used a large strip for the banner and then placed some washi tape and some Amy Tangerine paper for another banner.


I love doilies, and this one was just what I needed to break up the colours. I got out my Kaszazz Ezy Press and die cut some love hearts, from the Dear Lizzy music paper and for my photo and photo mat. There's a cute little transparency piece with gold dots on it in there, that came in a pocket letter swap, love all the bits I have collected from my pals!!!
I jazzed up some paper flowers with Color Shine and the Newsprint stamp, joined 3 together with a cute Basic Grey brad. All the other flowers were re-coloured with Color shine.


My wood veneers are from Merci and Stampin Up, enamel dots from Francheville and the Thickers are Amy Tangerine!


I finished off with some cute little, white embossed music notes, and went around the edges of my page with some Colourbox fluid chalk ink. I'm happy to say I dug deep into some old stash for this challenge, the Dear Lizzy paper, the little black and white border stickers, from Cloud 9 I think, and the brads, all go back a long time, feels good to do that!!!!
Thanks for looking! See you next time!!!
Tania

Tuesday, May 31, 2016

My Kraft Plus challenge entry

I have been frustrated this week, back and neck troubles have kept me away from my happy place at my craft desk. I thought I would try something smaller for this challenge, so I made a card. Here is the inspiration board from Kraft Plus...


Wow, what a fantastic image!!! But, it overwhelmed me a little. Once I sat down and looked at it, and individual clusters, I could let the inspiration take over. I started with a Gesso background, a bit of stamping and then some Colour Blast colour paste. I received the cool ship, chipboard piece & travel  tape from a pocket letter swap, and used lots of twine in the background. Then just stamped all my travel words in different colour Archival inks. Hope you like it!!!


Friday, April 29, 2016

More Than Words mini challenge

So today I am fading very fast with the dreaded flu, which was kindly passed onto me by my dear little 10 yr old boy!!! he's been sick for over a week! I still managed to get a little crafty challenge in at my desk, and that's what I love about the More Than Words Mini Challenges. (Click the link to take you to their Facebook page where the mini challenges are held!) if you would like to take a look at the Monthly Challenge and all the gorgeous inspiration, click here!
So the criteria for the mini challenge was to use the word FLY on a card/tag or ATC. I love tags, so that's what I made:


I've used a Kaisercraft script embossing folder, Distress Inks, Gesso to fade out the middle background, and coloured the Kaszazz bird stamps with Gelatos. The flowers are from Kaisercraft and Glitz Design, the lace is also from Glitz. There's a couple of little die cuts for the branches, (Kaszazz).


How cue are the little eggs!!! Finally I get to use up a few of those random pearls in my stash! The nest was made from some household twine. I separated it all and then bunched it up. My sentiment is a Dylusions stamp and the FLY stickers are from American Crafts. I am quite happy with the end result!!! TFL, Tania

Sunday, March 20, 2016

Kraft Plus March challenge - Houndstooth

Sooo many cool challenges all over scrappy blogland this month, I can hardly contain my excitement. Wish I had more hours in the day!!! I've managed a few so far this month though, and today I have completed the Houndstooth challenge for March over at Kraft Plus. There was also a sketch this month:


Loved this one!!! here is my take:


I have been wanting to scrap this photo of my little sister on her Wedding day for some time. Sadly, her and her Husband are no longer together, so it made it hard for me to do. This challenge was perfect, as it didn't have to be about the day, it was just about her and how absolutely beautiful she looked and how happy she was. I journaled my thoughts and hid them behind the photo!


I just love these watercolour title words by Heidi Swapp! I sprayed so many layers of coloured inks on there to get the right colour, then went over the top with a coat of gesso and voila- the colour I needed appeared!


Other products used were: Patterned paper by Kaszazz & Webster's Pages, (The Houndstooth paper is an oldie from Kaszazz and originally ivory, so I sprayed it with Dylusions!!)
Flowers- Bella, Prima & Scrap Matrix, Brads- Teresa Collins, Wooden leaves- Merci, Script stamp- Kaszazz, Silhouette cut file and Silhouette Cameo machine, Heidi Swapp Colorshine, Tattered Angels Glimmermist, and ribbon! TFL!

Sunday, February 21, 2016

Kraft Plus Feb Going Postal Challenge

So this one made me happy, as I have sooooo many postage stamps from my collecting days when I was young. What better way of using them, than on a scrapbook page!!!
This was the criteria in this month's Kraft Plus Blog Challenge:


Use postage stamps and a Kraft background!!! Here is my take on the challenge!


I have been stash busting alot lately, and used up some of my old Kaisercraft papers! I did lots of stamping on my background. Stamps by: Kaszazz, Urban Crafter & Collected & Co. I've had this cute little clock embellishment in my stash, from Craft Queen for a long time, love it!


I used some Black Gesso through a Kaszazz stencil for some texture, a couple of Prima flowers, old brads & of course some postage stamps!!! My journaling is hidden behind the photos!

Friday, February 12, 2016

A bit of Mood board inspiration!

So just sharing my take on the Feb 2016 Moodboard Challenge over at Scrappingclearly!
I just Love these blue colours and with the butterflys, it immediately inspired me to telll the story about my butterfly tattoo and why I got it!
Here's the gorgeous Moodboard:

And here's my take on it:


I was inspired by the lovely colours, the butterflys and the Morroccan Tiles.
I used some Kaszazz cardstock, Heidi Swapp & Blue Fern Studios papers, There's a journal spot which came from a FREE paper with Scrapbooking Memories Mag. Washi tape, a Chipboard title from Blue Fern, Stamps from Kaisercraft & Kaszazz, Dylusions spray inks & paints. I found my gold paint dabber and did some stamping with the Morroccan tile background stamp and love how this came out! I also used the old faithful Gesso and some Alcohol Ink Art markers!
I did some hidden journaling, describing when and why i got my tattoo and what it represents to me!


Wednesday, February 3, 2016

Australia Day Cybercrop fun with Scrappingclearly

So on Australia Day weekend, I had loads of Scrappy fun joining in with the Scrappingclearly Community in their Cybercrop! I love Cybercrops and hadn't been involved in one for awhile. I managed 5 projects, and I was very happy with myself for getting those stories told. The first one was to create a layout or project, about what Australia Day means to you! I have wanted to scrap these photos for awhile, well, they are from 2009 after all. What a perfect prompt for me to do so! So I even went all out and did a Project Life page, and that was good because I needed to start on those, I haven't done enough and want to do more, you can scrap so many pics in one go, just like this!!!


Look at my little kidlets, they are not this little any more!!!
The next challenge was to create a layout using this colour combo: YELLOW, ORANGE, BLACK AND WHITE...Right up my alley...


I'm happy with this one, used Mixed media on here, some Gesso, stamping, texture paste with paints & a stencil and rub ons. There's hidden journaling on the tag.
Challenge 3 was: 12345- 1 title, 2 techniques, 3 colours, 4 photos or more & 5 embellishments. This one came together fairly quickly!!!


I used an embossing folder and sponged ink through it for the background spots, then there's a piece of patterned paper at back with a shaving foam and Dylusions technique on there, along with some cute doilies and some old Kaiser paper I've had for ever. finished off with some little embellies: enamel dots and wood veneer flowers.
I will be back again tomorrow to share the last few layouts I accomplished. TFL :)


Monday, January 25, 2016

Art Journal page tutorial, by ME!!!

Hello, so as I made a promise to a few people who wanted instructions for this Art Journal page: ALWAYS BELIEVE, here I go with the how to!! I created this page for one of the Art Journal classes I teach, and it was a big hit. The creations made by my students were awesome, and i loved seeing the different takes!!!


So, as with most journal beginnings,
1 .YOU NEED TO GIVE YOUR PAGES A GOOD COAT OR 2 OF GESSO!!!

2. DIG OUT THAT STASH OF LACE YOU HAVE, ANY COLOURS, RANDOM BITS, LONG, SHORT, ANY BITS, AND ADHERE THEM IN STRIPS DOWN THE LEFT OF YOUR PAGE. (I used multi medium for an adhesive, but any collage or fabric glue will work!)( I STARTED LONG, & STAGGERED THEM, GETTING SHORTER AND SHORTER.) I STOPPED ABOUT 3/4 THE WAY BEFORE THE MIDDLE OF THE PAGE.
3. DO THE SAME ON THE OPPOSITE PAGE, STARTING AT THE EDGE WITH LONG BITS AND WORKING YOUR WAY BACK TO THE MIDDLE, TOP OF PAGE, WITH THE SHORTER BITS. ONCE AGAIN, STOP ABOUT 3/4 OF THE WAY ACROSS.
4. NOW YOU NEED TO HUNT THROUGH YOUR STASH OF UFO'S (unidentified objects, we all have them, in a tin, or a jar, and you have probably been collecting them for years!!! Guess what, Art Journaling allows a space for you to use them!!!!)BY UFO'S, I MEAN, METAL TRINKETS, BEADS, BROKEN JEWELLERY, CHARMS, FOUND ITEMS ETC.
5. YOU WILL ALSO NEED OTHER EMBELLISHMENTS, LIKE FLOWERS, CHIPBOARD BITS, OLD KEYS!!!
6.  NOW BECAUSE I DO WANT TO CLOSE THE PAGES OF MY BOOK, I WENT WITH FLOWERS, & A CHIPBOARD KEY, BUT YOU CAN ADD EXTRAS, AS LONG AS THEY ARE NOT TOO BULKY!
7.  FORM A CLUSTER OF FLOWERS, OR EMBELLISHMENTS IN THE BOTTOM LEFT AND TOP RIGHT HAND CORNERS OF THE PAGES, AND WHEN YOU ARE HAPPY, ADHERE THESE THINGS TO THE PAGE. (Please note, I have gemstones on my flowers, but they will be adhered to the page at the very end!)
8.  ONCE YOUR GLUE IS COMPLETELY DRY, MAYBE THE NEXT DAY IF YOU DON'T HAVE A HEAT GUN, PAINT OVER YOUR ENTIRE LACE AND EMBELLISHMENT AREAS WITH MORE, WHITE GESSO. MAKE SURE YOU GET A SMALL BRUSH FOR UNDERNEATH THE FLOWERS AND CHIPBOARD BITS, TO COVER COMPLETELY IN WHITE!)
9.  WHEN COMPLETELY DRY, SPRITZ THE ENTIRE PAGE WITH A LIGHT COLOURED SPRAY INK. PREFERABLY ONE THAT HAS A SLIGHT SHEEN OR SPARKLE TO IT!(I used a perfect pearls spray mist I made up myself.)
10.  ONCE THIS IS DRY, GRAB YOUR STAZ ON OR ARCHIVAL INK AND SOME BORDER STAMPS, OR BACKGROUND STAMPS, AND STAMP RANDOMLY ALONG THE EDGES, OVER THE LACE, IN BETWEEN EMBELLISHMENTS, WHEREVER ELSE YOU FEEL IS GOOD AND DO SO ON BOTH SIDES.
11.  NEXT, PICK A LIGHT C0LOURED DYLUSIONS SPRAY, (or other spray in your stash), I USED FRESH LIME, & STARTING WITH THE BOTTOM LEFT CORNER, (TURN YOUR BOOK UPSIDE DOWN, SO YOU CAN SPRAY FROM THE TOP OF THE PAGE,) SPRAY SMALL BURSTS AND LET IT RUN DOWN THE PAGE. ( JUST DID IT OVER THE LACE AREA TO ONCE AGAIN CREATE A STAGGERED LOOK!) UNSCREW THE LID OF THE INK AND USING THE STEM, FLICK SOME INK DROPS RANDOMLY OVER PAGE.

12.  WHEN THE INK IS DRY, TURN YOUR BOOK UPSIDE DOWN AGAIN AND DO THE OTHER CORNER, REPEATING PROCESS. (IF THE INK DOESN'T RUN, SPRAY SOME WATER OVER THE TOP OF IT TO THIN IT OUT, MAKE SURE YOU HAVE A CRAFT SHEET OR NEWSPAPER UNDERNEATH!)
13.  YOU WILL WANT THE DYLUSIONS TO BE COMPLETELY DRY BEFORE YOU SPRAY YOUR NEXT COLOUR, SO A HEAT GUN WILL COME IN HANDY TO SPEED UP THE PROCESS!- CHOOSE A 2ND SPRAY INK COLOUR, MINE WAS BUBBLEGUM PINK, A REPEAT THE PROCESS FOR THE FIRST COLOUR, BUT USE IT SPARINGLY, JUST A FEW BURSTS, REFER TO MY PHOTO! (I have tried to keep the centre area clean with plenty of white space for your quote!)
14.  DRY 2ND COLOUR & ADD A 3RD LIGHT COLOUR, LEMON ZEST WAS MY CHOICE! (This is also a good time to add any small areas of stencilling if you wish, I used my honeycomb stencil as a stamp with Dylusions ink and did a little randomly on the page.)
15.  WHEN THE INKS ARE DRY, YOU CAN DO A BIT MORE STAMPING WITH YOUR CHOSEN BLACK INK, (I did some music notes, and Script& Newsprint stamping!) (See photo!)
16.  NOW, IT GETS EVEN MORE 3 DIMENSIONAL!!! CHOOSE YOURSELF A COUPLE OF STENCILS, SOME TEXTURE PASTE, MATT OR GEL MEDIUM, OR IF YOU HAVE NONE OF THOSE, GESSO WILL WORK. I ONCE AGAIN, FOLLOWED THE PATTERN OF THE LACE AND ADDED TEXTURE PASTE THROUGH ONE MY STENCILS, ALTERNATING DIFFERENT ONES, AND BEING CAREFUL AROUND THE EMBELLISHMENT CLUSTERS. DO THE SAME ON EACH PAGE. *Once this starts to dry, and over a few days, you will notice some magic. The colours of the Dylusions, will be soaked up by the texture paste and you will see the colour in areas of your texture paste.


17.  WHEN THE TEXTURE PASTE IS COMPLETELY DRY, PICK A DARKER SPRAY INK COLOUR, MINE WAS POLISHED JADE, AND GIVE A FEW VERY SMALL SPRAYS IN EACH CORNER, TURNING THE BOOK UPSIDE DOWN FOR THE BOTTOM LEFT, AS BEFORE! *I watered this colour down as it was quite dark! Spray over the top with the water spray.

18.  ADD ANOTHER LAYER OF TEXTURE PASTE, USING A DIFFERENT STENCIL, AND WHEN DRY, ADD A 3RD LAYER OF TEXTURE PASTE IF YOU HAVE ANOTHER DIFFERENT STENCIL.
*While you are waiting for each layer to dry, you can have a look at your stash for your quote. (I used up words from parts of rub on quotes, stamps, stickers, magazine cut outs etc. I backed all of my words onto cardstock.)
18.  CUT EACH WORD OUT LEAVING A SMALL BORDER OF CARDSTOCK AROUND EACH ONE, THEN BLEND AROUND THE EDGES WITH SOME DISTRESS INKS. * I used Shabby Shutters, Milled Lavendar & Peacock Feathers. Set aside till the wet mediums are all dry.
19.  WHEN PAGE IS COMPLETELY DRY, STAMP A DREAM CATCHER STAMP, OR STAMP OF YOUR CHOICE IN BLACK INK AT THE TOP LEFT AS SHOWN, AND AN ARROW STAMP DOWN THE BOTTOM RIGHT. I ALSO STAMPED A SMALL SCRIPT STAMP NEXT TO THE DREAM CATCHER. WHEN INK IS DRY, COLOUR THE STAMPED IMAGES WITH DISTRESS INKS & A WATER BRUSH. *I use my acrylic block to dab some ink on, then spritz with water or use a waterfilled brush.


20.  ADHERE YOUR QUOTE TO THE PAGE AS SHOWN, OR WHERE YOU WOULD LIKE IT TO GO.
21.  I ADDED A FEW MORE FLOWERS, WHICH I COLOURED WITH DISTRESS INKS AND A WATER BRUSH AS ABOVE.
22.  ADD YOUR GEMSTONES TO CENTRE OF LARGER FLOWERS, AND ICE STICKLES OR OTHER GLITTER GLUE TO THE CENTRE OF SMALLER FLOWERS. *The Dylusions magic will happen again with the glitter glue and will soak up the colours of the inks.

So there you have it, quite lengthy, but a really fun process. Can't wait to show you some more projects using these techniques. Make sure you leave me a comment if you are here, especially if you are going to have a go at this page, would love to see the end results!!!


Saturday, January 2, 2016

My Guest Designer spot over at CSI

So excited to share my layout I created for my guest Designer position over at CSI-Color Stories Inspiration. I was invited to be a Guest Designer as I was a Special Investigator for November!!!
Such a thrill, to be up there with a huge line of talented ladies this month. make sure you click on the link and take a look! Check out the Case File Scheme below!


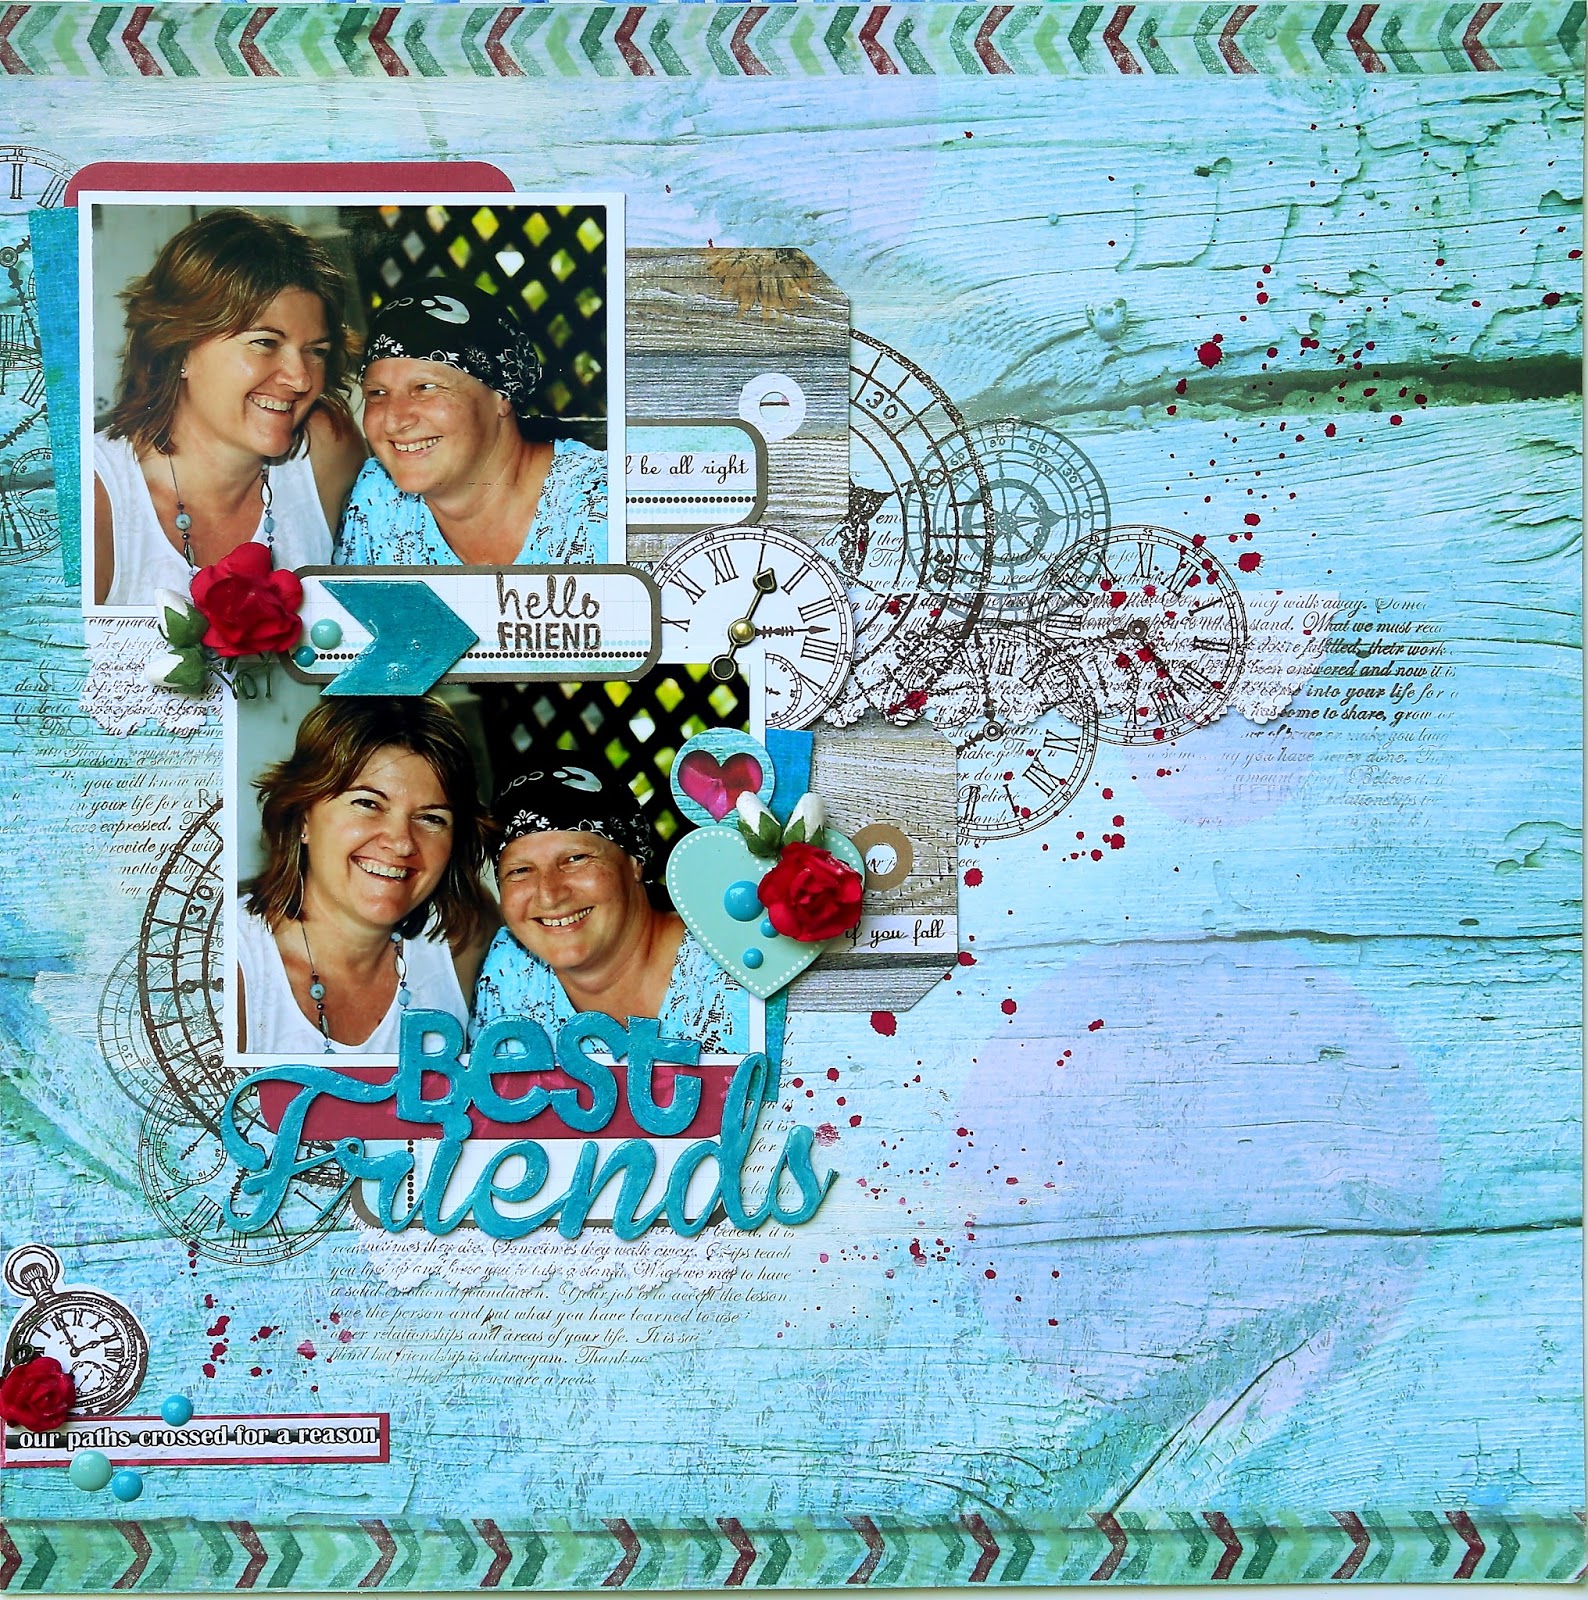
This is the layout I created.
It's a favourite of mine, as it's a tribute to my beautiful friend who has had a battle with Breast Cancer in 2015. She has just finished her treatment, which made her feel very yuck at times and has been a huge jourrney for her and her wonderful Hubby. I am happy to say her treatment has just finished and she can now start a new year with a positive new energy and look forward!!!


I have covered all criteria for the case file! I used papers from 7 dots and Kaszazz, Stickers & die cuts from 7 dots, stamps-Amy Tan & Kaszazz, Ranger inks, for the background stamping, Scrap Matrix & Imaginarium chipboard, enamel dots, washi tape, Gesso & Dylusions sprays. there's a Heart sticker in there I have had in my stash for about 6 years from Christina Re, love using up old stash!


Tuesday, July 28, 2015

Kraft Plus July challenge

This month, I have just made it again to play along with the Kraft Plus challenge. I have been pre-occupied with my SBM Masters entry, so it was nice to do a quick page without the pressure.
Here is the mood board, the theme was Mustard and Explosion and paint!!


I had fun with this one, didn't get too serious, just needed a bit of colour therapy, so the yellow was perfect!
Here is my layout:

I used some gesso first, then added some Kaiser paint and water. I dabbed some distress paint splats on there and used a little texture paste with a negative of a flower centre die cut. I was inspired by the  white love heart in the photo, and made a texture paste heart to sit behind the photo. (I used a stamp for this). There's loads of background stamping, stencilling and a few Amy Tangerine papers, My Mind's eye stickers, sequins, and a Merci flair. I used my Brother label maker for a few lines of journalling. The feather border is a Glitz design roller stamp. TFL!

Sunday, May 17, 2015

Kaszazz Team Training Day

Had a fab day today with some fellow Kaszazz Consultants for Team Training Day. My challenge entry came 1st, so I'm more than happy about that. I did a Project Life spread , with some of my hand-made PL cards, inspired by a class I took at Big Picture Classes. Here's my page:


I made the Project Life cards using a stencil and some Matte Gel medium and gesso mixed with acrylic paints. Then sprayed some Dylusions through the stencil for another layer. Here's the cards up close.


Monday, March 30, 2015

Challenge Day for me....ANOTHER FREAKING SCRAPPY CHALLENGE!!!

Well, what a cool name for a challenge site!!! Another Freaking Scrappy Challenge has a different take on challenges, and one I like, not too demanding or stessful this month, Just CREATE WITH THE COLOUR BLUE, or CREATE ABOUT SOMETHING THAT MAKES/MADE YOU BLUE.
So Blue it was, and funnily enough, I now have a few projects on the go using the colour blue!!!
Here's my entry:


It's a Mixed media Art Journal page, created with tons of stuff. After priming my pages with Gesso,  I started by slapping some paint onto my acrylic block and then stamping it onto my pages, which created some uneven gaps. In the gaps, I used some Gelatos, (thanks to my friend Vicki at Scrap matrix!!!), and loved playing with these by the way, great for blending some added colour highlighs. I then went a bit stencil crazy with the stars and a beautiful flourish. I then used some Kaszazz and Kaiser stamps with black acrylic paint and Staz On, The middle of the dream catcher started as a stencilled image, then I added a bit of black texta and filled in the outsied edge with some black lace!! Wowza, another item I've used that's been in my stash forever!! In the middle of the dream catcher I used some micro beads, clear gesso, which for some reason didn't dry clear, so I added some Perfect Pears over the top!!! The feathers were also a much held onto item in my stash!! And the beads are from a much loved broken necklace!!! Very happy to have used up some stuff! TFL!
Related Posts Plugin for WordPress, Blogger...